Saturday, September 8, 2012

Oh So Tasty Chili

I love making chili.  I can never make just a small batch either.  Its one of those dishes that's even tastier as leftovers (since the flavors have a chance to develop more as it sits).  You can also use the leftovers in a variety of ways; chili dogs, chili fries, you can even add rice or noodles to make it even more filling.

Crock Pot Chili

1 lb ground beef
1 onion, diced
1 green pepper, diced
2 14.5 oz cans petite diced tomatoes (juice and all)
2 15 oz cans of dark red kidney beans, drain only the top part of the juice off the beans
23 oz of tomato juice (1/2 a 46 oz bottle or big can)
1 Knorr Homestyle concentrated beef stock
3 tbsp chili powder
1/2 tbsp cayenne pepper
1/2 c homemade brown sugar, recipe to follow
dash of nutmeg
salt and pepper to taste
Optional:  any extra veggies you may have on hand

Cook your ground beef, green pepper, and onion together, drain.  In a crock pot combined all the ingredients listed above, and stir well.  Cook on low for 4-6 hrs.  Make sure to taste often and adjust your seasonings as needed.


Homemade Brown Sugar

1 c white sugar
1 tbsp molasses

Combine sugar and molasses in a bowl, and mix.  There will be a point in time while you are stirring that it may look like you aren't doing it right, but keep stirring.  It takes a few minutes, but it will eventually begin to look like it should

Thursday, September 6, 2012

Stuffed Crepes with Raspberry Sauce

Tonight I decided I wanted to do a little bit of experimenting in the kitchen.  I bought some raspberries earlier this week, and they needed to be used up.  I thought about doing a cobbler, but I that just didn't sound all that appealing today.  Instead I decided to go with some stuff crepes.  We love having breakfast for dinner in our house, and usually we'll do it once a week.  Here's what I came up with for tonight.

Stuffed Crepes with Raspberry Sauce


Crepes

1 cup all-purpose flour
2 eggs
1/2 c milk
1/2 c water
1 tsp vanilla
1 tbsp sugar
1/4 tsp salt
2 tbsp butter, melted


Combined all ingredients in a mixing bowl, adding the butter last (you may need to add a little extra water if your mixture is too thick...it should be slightly runny).  Heat a frying pan or griddle on medium high heat, and lightly butter or spray cooking surface.  Use a 1/4 c measuring cup to pour batter on to the pan.  Cook both sides until light browned.

Raspberry Sauce

6oz red raspberries, mashed
1/3 c sugar
1/4 c water
1 tsp cornstarch

Mix berries, sugar, and water in a pot.  Heat on medium high height, whisking occasionally.  Don't boil, just heat until sauce is hot and just begins to thicken.  Remove from heat and add 1 tsp cornstarch.  Whisk well.

Sweet Cream Cheese Filling

4 oz cream cheese, softened
1/4 c confectioner's sugar (powdered sugar)
1 tsp vanilla extract

Use a hand mixer to thoroughly combine all ingredients in a small mixing bowl.

Assembly:
Lay out one crepe.  Spoon as much or as little cream cheese filling on one side, and roll it up so cream cheese ends up in the middle.  Spoon raspberry sauce on top.


I paired my crepes with some tasty bacon.  My favorite way to cook bacon is in the oven.  I use a wire cooling rack on top of a cookie sheet.  This way the fat drains away from the bacon.


Taco Salad


This is a great recipe for parties, pot lucks, and get togethers!


Taco Salad

1 lb of taco meat (I cook mine ahead of time)
1/2 head of lettuce, chopped
2 tomatoes, diced
1 green pepper, diced
4 green onions, diced
3/4 of a bag of dorritos, crushed
1/2-3/4 of a bottle of catilina dressing (more or less depending on your taste)
1 c of Mexican blend shredded cheese

This is by far the easiest recipe ever!  Once everything is chopped, diced, and prepped, mix it together in a large mixing bowl.  That's pretty much it :-)

Monday, September 3, 2012

Veggie Pizza Appetizer

I hope everyone is enjoying their Labor Day!  Here's a fun little recipe perfect for parties.


Veggie Pizza Appetizer


2 packages refrigerated crescent rolls
1 cup
1 (8 ounce) package cream cheese, softened
1 teaspoon dried dill weed
1 (1 ounce) package ranch dressing mix
1 small onion, finely chopped
1 stalk celery, thinly sliced
1 red bell pepper, chopped
1 cups fresh broccoli, finely chopped
1 carrot, grated


Preheat your oven to 350 degrees F). Spray a cookie sheet with cooking spray.  Make a crust with the crescent roll dough by laying it out across the pan and connect any pieces/seems.  Bake the crust for 10 minutes, and then let it cool to room temp.  In a mixing bowl, combine sour cream, cream cheese, dill weed, and ranch dip mix. Spread this mixture on top of the crust, and arrange veggies on top.  Cut and serve.  This recipe is great for parties. 

Sunday, September 2, 2012

Save a Little Time During the Week

One of my favorite things to do in the kitchen to save time is cooking and portioning off meat that I plan on using in my recipes for the upcoming week.  I just went grocery shopping today, so before I freeze my meat, I'm going to work on cooking, prepping, and portioning.

I bought 6lbs of ground beef, 2 cornish game hens, and 2 bags of frozen chicken breasts.  I am just going to focus on the ground beef in this post.  The chicken breast are individually frozen in the bags, so there is no need for me to portion them.  I can just grab how ever much I need straight from the bag without defrosting the whole thing.  The cornish game hens will be used later in the week for a recipe, and since they are frozen solid, I'm not touching them today.


This is what I plan on making with the ground beef:


1 lb of taco meat
1 lb for chili
1 lb cooked off and frozen for future use
2 lbs portioned off for meatloaf
1 lb portioned off for burgers


This can take a little while to do, but it will save you time later on. I start by cooking off my 1lb of ground beef I plan on freezing for later use.  I like to keep 1 lb of unseasoned ground beef in the freezer for random days I don't have anything planned.  I can use it in a variety of dishes, and since its already cooked, I can defrost it and add it in to whatever I'm cooking.

I cook the ground beef for my chili next.  I always cook it with green peppers and onions (one of each).  It adds a little extra flavor to the beef.  I make a very tasty chili.  I'll post my full recipe for this one later on in the week, so make sure to check back in.

The last one I cook off will be the taco meat.  Since it is the most seasoned, I save it until the end.  I'll be using this one to make a taco salad.

Make sure you drain the fat from the meat prior to placing it into a container to freeze.  I like to use microwave safe containers, but you can use quart size freezer bags.  Make sure you label and date your foods, especially if you plan on freezing them for later.

The remaining 3lbs of ground beef I decided to just portion off and freeze.  I could have made these ones in advance, but I also plan on doing future blog posts about these items, so I left them plan for just that reason.

Total time spent in the kitchen was a little more than an hour, but just this little bit of work ahead of time will save me so much more time when I go to cook later on in the week.

Saturday, September 1, 2012

Sorry for No Updates

I have to apologize.  Between everyone getting sick, and trying to finish up projects for my last week of my math class, I've had no time to update.  Since everyone's been sick we've been eating a lot of our leftovers from this past week.  Don't worry, I'm thinking of new recipes and checking out my pinterest boards for some ideas.  I'm hoping to have a couple good deals to share in the next week or so too.

Thursday, August 30, 2012

Soup for the Sick


My husband and kids have been hit hard with a cold.  They have been miserable all week.  My husband really wanted soup, and of course I don't have any on hand.  After a quick glance in the cupboards, fridge, and freezer, I was able to find a few ingredients to whip together a tasty soup.  I had that remaining 1 lb of ground beef that I froze earlier in the week.  There was leftover rice from my pork and rice wraps in the fridge.  I always keep frozen veggies on hand.  The black beans were leftover from nacho night, and after much digging, I found some beef stock in the cupboard.  My favorite part about this soup is the fact that I was able to use up a lot of my leftovers.

Easy Beef, Rice, and Veggie Soup

1 lb of ground beef, cooked
24 oz of frozen mixed veggies
1 1/2 c of cooked white rice
1 c black beans, cooked, drained
8 c water
3 Knors Homestyle Stock, beef flavor
salt, to taste
pepper, to taste


Combine all ingredients, minus the rice, together in a crock pot.  Cook on low for 4 hours.  Add rice and continue to cook on low for another hour or two.  Stir and taste continuously.  Add salt and pepper as needed.

Note:  Beans must be cooked.  Dry beans will not soften fast enough for this recipe if you just add them in.  Rice should also be cooked prior to adding.  Rice absorbs a lot of water and seasoning.  Cooking rice first and then adding it in later will not only prevent the rice from over cooking and turning to mush, but it will keep it from absorbing too much water and flavor from the soup.  

Tuesday, August 28, 2012

Crock Pot Pork Wraps

So yesterday I thought I'd get a jump start on cooking pork chops in the crock pot.  Unfortunately when I turned it off, I forgot to put them in the fridge after they cooled. I remembered when I woke up at 5am today.  It smelled so yummy though, that I just had to re-do it.


Rick wanted corn in his.  

Six hours in the crock pot.
Pork and Rice Wrap

3lbs boneless pork chops
2 cans Campbells French Onion Soup
1 can Pinto Beans and Jalapenos, drained
1/8 tsp cumin
1/4 tsp cilantro (if using fresh use 3/4tsp instead)
2 cups cooked rice
12 flour tortillas


Place pork chops and french onion soup in crock pot and cook on low until pork is tender (3-4 hrs).  Remove pork from crock pot, but reserve juices.  Using two forks, shred the pork.  Return pork to juices.  Add pinto beans, cumin, and cilantro.  Let simmer in crock pot for at least 2 hrs.  Layer rice and pork in a flour tortilla, and roll it up like a burrito.  It's so simple, and very tasty.  :-)


Monday, August 27, 2012

Working on Something New

I'm in the process of coming up with something new.  My kids are still sick, so it was just a simple dinner tonight.  I decided I was going to start cooking pork chops in the crock pot.  I added 5 bone-in chops with 1 can of Progresso French Onion soup (I didn't have any Campbells concentrate, so I'm making do with what I had on hand).  I haven't quite figured out what I'm going to do with it, or what I'm going to add to it yet, but hopefully something will inspire me in the morning.  Check back in tomorrow evening to see what I've made.

Sunday, August 26, 2012

Bacon Wrapped Stuffed Chicken

Bacon happens to be one of my families favorite foods, so naturally I like to cook with bacon.  This recipe is super easy, but will look like you spent a lot more time on it than you really did.

Bacon Wrapped Stuff Chicken


4 Chicken Breasts
8 pieces of Bacon, uncooked
4 oz Chive and Onion Flavored cream cheese
1/4 c Cheddar Cheese, shredded


Clear wrap over the chicken keeps
 mess at a minimum.


Preheat your oven to 350 degrees.  Using the flat side of a meat mallet, pound each chicken breast until it is flat enough to roll up (Tip:  use a piece of clear wrap on top of the chicken while you are flattening it, it will be less messy and prevent the chicken from sticking to the mallet).


Bacon ends should be on
the bottom of the breast.

Spread approximately 1oz (about 1tbsp) of cream cheese in the on side side of the chicken breast.  Add about a pinch of cheddar cheese on top of the cream cheese.  Roll up the chicken.  Next, take a piece of bacon and begin wrapping the chicken.  You'll need 2 pieces per breast.  Try to make it so the ends of the bacon start/end on the bottom of the chicken.  Bake for approximately 40-45 minutes.


Saturday, August 25, 2012

I Hate Colds

My poor babies are coming down with colds.  It's been such a long day.  Sorry, but no recipe tonight.  After dealing with cranky babies and running all over the place trying to find a Target that had Danimal Crunchers (that's Dexter's favorite yogurt, and there was a great coupon pairing that made each pack just $0.25), I'm exhausted.  We did take out tonight.  I'm going to be making bacon wrapped stuffed chicken breast tomorrow though, and promise its going to be a tasty recipe.  :-)

Friday, August 24, 2012

The 3 lb Plan...Part 2

Yesterday I told you all about what I was making with the 3 lbs of ground beef I defrosted.  Last night I made nachos.  I also cooked off 1 lb of the ground beef and froze it for a future meal.  On the menu for tonight is Bacon n Cheese Guac Burgers on King Hawaiian Rolls, served with corn on the cob, and Sweet Mesquite Bush's Grilling Beans.

I actually prepped my burger meat yesterday.  I like to mix my ingredients into my ground beef, instead of piling everything on top.  I think it makes the burgers more flavorful and unique.

Bacon n Cheese Guac Burgers

1 lb Ground Beef
3/4 c Shredded Cheddar Cheese
4 strips of Bacon, cooked extra crispy, chopped.
1 egg, beaten
1-2 dashes of Garlic Powder
1-2 dashes of Onion Powder
1/4 tsp Pepper
1 pkg 6ct King's Hawaiian Hamburger Buns, OR 1 pkg 12 count King's Hawaiian Rolls if making the slider version
Wholly Guacamole Spicy Pico and Guac Dip (located in the produce department)


Use a wire cooling rack when broiling. 
Preheat the broiler on your oven (you may choose to grill these instead, in which case preheat your grill).  Set a wire cooling rack on a broiler safe pan.  This helps to cook your burger more evenly, and prevents it from sticking to the pan.  Combine all ingredients in a large mixing bowl, add the egg last.  The egg acts like a binding agent holding all the ingredients together.  Feel free to play around with the amounts of cheese and bacon (note:  if you add too much cheese or bacon, you may not be able to properly form burger patties).  Mix well with your hands.  Once everything had been combined, form 6 even sized balls.  Use your hands to flatten each one into burger patties approximately 1/4 in thick (you want it to be wide enough to cover a bun).  Place the patties onto the wire rack, and place in the oven.  Broil for approximately 10-15 minutes, checking around the 10 minute mark for color and temp.  Serve on King's Hawaiian Hamburger Buns with a small amount of Wholly Guacamole.

Slider Version:
Follow the instructions above, but instead of making 6 balls, make 12.  Broil for 10-15 minutes, checking around the 10 minute mark for color and temp.  Serve on King's Hawaiian Rolls with a small amount of Wholly Guacamole.

Ava says, "Mmmm."

Labor Inducing Foods and Recipes


My friend Alexis is on the verge on having her new little one, and I wanted to dedicate this post to her.  When you're that close to the end of your pregnancy, we often look for creative ways to help our bodies get that labor process moving along.  With my last baby, I was stuck in the early stages of labor for 2 weeks!

There are all sorts of labor inducing ideas and activities out there.  My favorites have always been labor inducing foods and recipes.  It is important to understand that if your body isn't ready for labor, these methods will not work.  You should always wait until you are full term and your Dr has given you the green light to try bringing on labor on your own.

(click on the links below for the recipes)


I tried  these, and I actually liked them.  They reminded me of spicy ginger snaps.  Once you've baked the cookies, you are suppose to eat as many as you possibly can.  The combination of the spices are suppose to help trigger contractions.  Be warned though, these cookies also make you poop.  Make sure you have a bathroom near by.  


I wanted to try this, but sadly I couldn't find eggplant in any of the stores around me.  According to one clerk I asked, there was an eggplant shortage.  I did make the sauce though and used it to make a lasagna, and I thought it was tasty.


I really liked this link.  The eggplant parmigiana and the labor inducing cookies are including on this list as well as 7 other foods that are suppose to help bring on labor (with links to recipes).  

I had fun with my attempts to bring on labor.  I even threw a "Get This Baby Out of Me" Party.  I served a variety of labor inducing foods (including pineapple and lasagna made with the eggplant parm sauce).  Everyone shared their tips and tricks of things to do to help further my labor along (sex was always the most popular tip...lol).  We played games on the Wii for hours hoping the constant movement would work.  In the end none of it worked for me, but it was fun giving everything a try.  

Thursday, August 23, 2012

The 3lb Plan...Part 1

If you read my previous post, then you will remember I was trying to defrost a pack of ground beef.  If you didn't read it, I'm sure you'll figure out that I'm working with ground beef today.  Anyways, my ground beef is defrosted.  I tend to buy the larger packs of ground beef when I go shopping.  It's just cheaper.  Usually I'll try to portion them before I freeze them, but this last time I forgot.  Once you defrost something, you cannot refreeze it, unless you cook it off first.

Alright, so I have 3lbs of ground beef to play with.  Here's my plan:

Nachos with a Creamy Salsa
Bacon n Cheese Guac Burgers on King Hawaiian Buns
1 lb will be cooked off and frozen for a future meal

Tonight I'm in the mood for nachos.  The kids have to eat dinner a little earlier than normal today, so I've decided I'll make nachos for me and Rick since we don't need to eat until later.  As you can tell from the title, this post is going to be divided.  Part 1 will focus on the nachos, and Part 2 will will be the guac burgers (I'll post that part tomorrow).

Nachos with a Creamy Salsa

1 lb Ground Beef, cooked and drained                        
1 packet of Taco Seasoning
2 dashes of Tabasco Sauce (optional)
Tortilla Chips
1/2 can Black Beans, drained and rinsed
1 can Jalapenos, drained
Mexican Blend Shredded Cheese
Aluminum Foil or Parchment Paper

4oz Salsa
4oz Cream Cheese, softened


Preheat your oven to 350 F and line a cookie sheet with aluminum foil or parchment paper.  Cook and drain your ground beef, then season it according to the directions on the taco seasoning packet.  Add a couple dashes of tabasco sauce to the taco meat.  Now you can begin to layer your nachos.  Start with the tortilla chips, then the taco meat, cheese, black beans, and finally the jalapenos.  Bake for approximately 10-15 minutes or until your cheese is melted.  (Note:  You can use the broiler, but keep an eye on your chips.  The broiler cooks a lot hotter and faster, and tortilla chips tend to burn rather quick.)


While your nachos are cooking, you can being making your creamy salsa.  In a small mixing bowl, combine salsa and cream cheese.  Stir well.

Once the nachos are complete transfer them to a larger platter and serve the creamy salsa on the side.

Enjoy!

Oh No... I Forgot to Pull Something Out of the Freezer for Dinner

EVERYONE has a day when they forget to do something.  As a mom, I have plenty of days like this.  Apparently that was yesterday for me.  I opened the fridge this morning to check on the hamburger I thought I pulled out of them freezer last night only to realize I didn't do it.  Normally on days like this I say screw it, we are ordering take out tonight, but we went to Chuck E. Cheese last night, so I don't want to spend any more money.  Instead, I'm going to tackle my frozen meat dilemma.


I could just defrost it in the microwave, but I'm not a fan of doing that.  Half the time it never fully defrosts correctly.  You are either are left with sides that are fully defrosted, but its still frozen in the middle, or the outside ends up cooked and rubbery and the inside is perfectly defrosted.  It ends up taking up more time than you originally planned, plus it can be messy trying to scrape away defrosted meat one layer at a a time.  Instead, I'm going to use a cold water bath.

What's a cold water bath?  It's just what it sounds like.  You place your frozen food item into cold water and slowly defrost it that way.  Depending on the size of the item, it can take an hour or two.  The cold water helps to defrost your meat without the worry of partially cooking it.  Before you begin, make sure to thoroughly clena your sink and rinse it well.


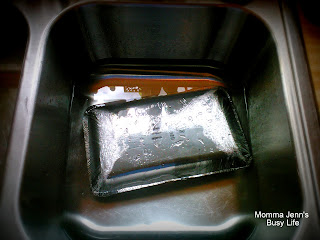
Begin by filling your sink with cold water.  How deep you make the water depends on the size of the frozen item.  Leave your meat in its originally packaging.  If its packaged like my ground beef, place it foam board side up.  Foam floats, so placing it face down works best.  You can put a heavy bowl or something similar on top to fully submerge it.  If you are worried about water leaking into the container, you can always place it inside a gallon size baggie or wrap it a few times with clear wrap.
**Tip:  If you forget to take your Thanksgiving turkey out of the freezer to defrost early enough, you can place it in a cold water bath overnight, and it will be defrost by morning.

I've had some people ask about using hot water in place of cold water.  While hot water does seem to defrost faster, it is not safe to do this.  First, you can end up partially cooking the outside of your meat while the inside is frozen, which ruins the texture of the meat.  Second, and probably the most important reason, having your meat sit in hot or warm water increases the chances of food born illnesses.  This is also why it is not recommended to defrost your meat on the counter.  Food poisoning is never a good thing.  Babies/toddlers (those kids under the age of two), the elderly, and people with compromised and weakened immune systems are the most susceptible.   

Make sure to check back later.  I'll show you what I'm making with my ground beef.  :-)


Wednesday, August 22, 2012

BzzzAgent

Have you heard of BzzAgent before?  If not, you should check it out.  It's a great place to try out new and popular products.  I'm currently doing two campaigns.  The first is Progresso Recipe Starters.  I saw a coupon in a recent Sunday insert, and it looked pretty tasty.  I'm very excited to be getting this one in the mail!


The second campaign I'm participating in is the Glade Expressions campaign.  I love Glad Expressions.  The Apple, and Lavender scents are two of my favorites. Having two little ones in diapers can make my house pretty stinky, and these work so well in helping to eliminate those smells.


If you have a free moment, check out their site.  You need to complete surveys in order to qualify for things, so make sure to complete several to increase your chances at being selected.  :-)


Here's a Tasty Spin on a Kid Favorite!

I wish I had a picture of this one.  I'll have to remember to take one the next time I make it. Dexter is going through this whole "anti-fruit" phase right now, so I find myself having to come up with new and clever ways of hiding it in his favorite foods.  I wanted to make peanut butter and jelly sandwiches one day, but realized I was out of jelly.  I had some over ripe bananas, but I needed to be sneaky when trying to substitute them in place of the jelly.  Here's what I can up with.

Peanut Butter and Banana Stuffed French Toast

4 slices of bread
1 egg
Milk
Dash of cinnamon
Peanut butter
½ an over ripe banana, mashed
Butter
Honey

In a shallow dish, beat egg, milk and cinnamon until thoroughly combine.

Spread a layer of peanut butter on two slices of bread.  Spread mashed banana on top of peanut butter.  Place other slices of bread on top of the peanut butter and banana spread.
Dip each side of bread into egg mixture, use hand to ensure the bread is covered with mixture. 
Place each “sandwich” on to a heated skillet (you can use a small amount of butter, olive oil, or cooking spray to prevent sticking if you wish), and cook on med high heat until golden brown .  Once one side is golden brown, spread a small amount of butter followed by 1 drop of honey on bread (spread the honey to cover that entire side).  When opposite side has cooked completely, flip it over and let the honey side cook for approx. 1-2 minute or so, turning down heat if needed.  You want the honey to melt into the bread.  The bread will look shiny and the honey won’t be as sticky when it is done.  

The filling will be hot, so if serving to a child cut the French toast first so it can cool faster. 

This has become a favorite in our house.  :-)

Tuesday, August 21, 2012

Whats for Dinner Tonight?

It's a leftover challenge!

I have leftover chicken and plain pasta leftover in my fridge.  I want to use these up, so for inspiration I turn to pinterest.  There is a recipe on my Food Experiments board that I've made quite a few times before that I absolutely love, Egg Rolls and Asian Spaghetti.  I am actually pulling inspiration for this dish from the Asian Spaghetti part of this recipe.  Check out the link below for the original recipe:

Egg Rolls and Asian Spaghetti

Asian Styled Chicken Spaghetti

What you'll need:

1-2 Chicken Breasts, skinless, cooked and chopped (I used a left over leg quarter (leg and thigh) plus 1 additional leg, but you can use whatever you have on hand if using leftovers)
1 Egg, beaten
1/2 box Spaghetti Noodles, cooked  (I used my leftover noodles, approximately 1/2 a box)
1 Carrot, shredded
4 Green Onions, diced
1/4 tsp ground Ginger, (or 1 tbsp fresh Ginger, minced)
1/3 c Soy Sauce
1tbsp Oil (I prefer Olive Oil, but Vegetable Oil works just as well for this recipe)


Grater, Vegetable Peeler, Chefs Knife,
Paring Knife, and Containers for
the Prepped Food

If you have time earlier in the day, get your prep work done.  You can chop the chicken and shred and dice your carrots and green onions in advance.  It makes the whole cooking process go faster.  Before you begin, gather all materials that you need for the prep.  Once everything is shredded and chopped, refrigerate until you are ready to cook.
All prepped and ready to go!


I like using a wok when cooking dishes like this.  They are larger than your standard saute pan, and are a lot better at distributing heat.  You can use a regular saute pan (aka frying pan) if you don't have a wok.  Keep in mind that since they are smaller you may need to cook smaller amounts at a time in order to heat everything thoroughly.

Read the instructions that came with your wok for the proper way to clean, season, and store it. 


 Let's Get Started!

Turn your heat on medium high (you may need to lower the heat if using a wok).  Add oil once pan/wok has been heated.  Once oil is hot, add green onions and ginger.  When it is fragrant, add meat, then carrots.  Next add your noodles, and cook until hot.  This whole process goes relatively quick when using a wok.  Add soy sauce next (you can add more or less per your own taste), and toss mixture well.  Push noodle mixture off to the sides of the pan and add your beaten egg.  Push egg around and cook like you would a scrambled egg.  Stir fry all ingredients for another minute and then remove pan from heat.  

Adding the Egg
Finished!


I'm paring this with some store bought egg rolls.  I love making my own, but since we had some in the freezer, I decided they needed to be used up first.


Oreo Stuffed Chocolate Chip Cookies


I saw this recipe floating around facebook a few months back.  I'm not sure who created it, but it has become one of my favorite cookie recipes.  Make sure you use double stuffed Oreos when making this recipe.  You can make it with the regular ones, but they are a lot better with the double.

OREO STUFFED CHOCOLATE CHIP COOKIES

2 sticks softened butter
3/4 Cup packed light brown sugar
1 Cup granulated sugar
2 large eggs
1 Tablespoon pure vanilla
3 1/2 Cups all purpose flour
1 teaspoon salt
1 teaspoon baking soda
10 oz bag chocolate chips
1 bag Oreo Cookies (double stuffed)

Preheat oven to 350 degrees F. In a stand or electric mixer cream butter and sugars until well combined. Add in eggs and vanilla until well combined.

In a separate bowl mix the flour, salt and baking soda. Slowly add to wet ingredients along with chocolate chips until just combined. Using a cookie scoop or large spoon, take one scoop of cookie dough and place on top of an Oreo Cookie. Take another scoop of dough and place on bottom of Oreo Cookie. Seal edges together by pressing and cupping in hand until Oreo Cookie is enclosed with dough. Place onto a cookie sheet (tip:  parchment paper helps prevent you cookies from sticking to the sheet) and bake cookies 9-13 minutes or until cookies are lightly browned. Let cool for 5 minutes before transferring to cooling rack.

Makes about 2 dozen VERY LARGE Cookies

Wonder Woman's Schedule


One of my friends from my April Mommies Couponing group (Katey Marie I'm talking about you) gave me this nickname several months ago.  I am one busy momma.  I often joke with friends that I must be a robot because that is the only logical way I can explain how I managed to get everything done.  lol

I'm really not a robot.  I just rely on schedules to get everything done.  Kids thrive on schedules and predictability, especially toddlers since they don't quite understand the concept of waiting for things.  I try to make our days as predictable as possible.  Not only does it help my little ones, but it helps me keep track of things I need to do.

I had two schedules I follow during the week.  One is specifically for the kids.  I keep track of appointments, therapy schedules playtime and activities, play dates, etc.  The other schedule is for myself.  I keep track of what days I need to do certain things around the house, assignments, etc.  Nothing is perfect, and some days I do have to change things around last minute.  For the most part though I try to follow the same basic routines every day.

How can you free up some time for yourself?  Write up a schedule.  Pick certain days of the week to get certain chores or projects done.  Schedule in your kids activities (for example, go to the park after lunch, water play in the morning, arts and crafts after nap time, etc.).  You don't need to set up exact times for everything.  Schedules don't work for everyone, but if you're feeling overwhelmed, give it a try for a week or two and see if it helps you.


Here's a real basic example of my schedule for the week:

Monday:
Therapy
Free Play
Book Time
Basic Cleaning (toys, counters, trash)

Tuesday:
Outside Play
Therapy
Puzzles/Blocks
Laundry
Baths

Wednesday:
Therapy
Free Play
Arts and Crafts
Basic Cleaning

Thursday:
Therapy
Puzzles/Blocks
Free Play
Floors
Baths

Friday-Saturday:
Family Activities
Projects/More Detailed Cleaning
Catch up and/or get ahead on Assignments
Baths


Monday, August 20, 2012

Fruit Pizza

This is quite possibly one of my favorite fruit desserts.  I actually came up with the recipe after experimenting with a few different fruit pizza recipes.  I really liked elements of a couple different recipes, and I decided to mix them all together to make something new.

You can make this ahead of time.  The crust is hard.  It won't soften and turn mushy real fast, so you can make it hours ahead of time.  Make sure to grease your pan well to prevent stick while you bake the crust, and you will need a sharp knife to cut it.


Fruit Pizza

Crust:

2 c flour
½ c confectioner’s sugar (powdered sugar)
1 c cold butter

In a large bowl, combine flour and confectioners' sugar. Cut in butter until crumbly. Press onto an ungreased 12-in. pizza pan or a 13x9 cookie sheet. Bake at 350 degrees F for 12-15 minutes or until very lightly browned. Place on a wire rack to cool.

Toppings:

1 (8 ounce) package cream cheese, softened
1 (8 ounce) container frozen whipped topping, thawed

Fruit (Strawberries, Bananas, Kiwi, Blackberries are what I used, but you can use whichever fruits you like….to keep your bananas from browning, squeeze a little lemon juice on the slices)
In a large bowl, soften cream cheese, and fold in the whipped topping. Spread over cooled crust.  Slice fruit, and arrange it on pizza

Glaze:

1/2 cup white sugar
1 pinch salt
1 tablespoon cornstarch
1/2 cup orange juice
2 tablespoons lemon juice
1/4 cup water
1/2 teaspoon orange zest

In a saucepan, combine sugar, salt, corn starch, orange juice, lemon juice and water. Cook and whisk over medium heat. Bring to a boil, and cook for 1 or 2 minutes, until thickened. Remove from heat, and add grated orange rind. Allow to cool, but not set up. Spoon the glaze over the fruit, and chill for two hours.


The Beginning...

I've finally done it.  I've joined the blogging world.  I've been debating it for a while, and after much going back and forth on the idea, and a few requests from friends and family, I decided to take the plunge.

So Whats My Blog About?

Like the title suggests, it's going to be about everything!  I am going to talk about my wonderful children.  I'm going to write about my recipes and experiments in the kitchen.  I'm going to share what we are having for dinner, what desserts I'm making, and I'll even share my menu planning tips for all occasions.  I'll also share the great deals I find, and couponing tips.

About Me

I am a 29yr old SAHM, and a college student.  I am currently going for my bachelor's degree business management.  My true passion is hospitality management though, specifically in the culinary field, but with my busy schedule I am unable to attend a traditional campus, so I am taking online courses.  I would love to complete my hospitality degree once my kids are a little bit older and in school full time.  I have a strong passion for cooking, and I enjoy spending time in the kitchen cooking and baking.

I have two children and an awesome husband (Rick).  Ava is 16 months, and Dexter is 2 years. 

I love bargain hunting and couponing.  I love finding great deals on things my family needs.  We are a one income family, so I take it upon myself to make the most out of what we have.  

I'm excited to get this started!